Showing posts with label craft. Show all posts

Thursday, May 24, 2012

Once a month my husband helps two widows from our church.
One of the ladies asked him if he could cut off the bottom of
the clipboard on the left so she could write a little easier at
her bible study class.  He brought it to me and asked if I
could help with this project.

So for $1.99 we bought a new clipboard and I painted it
with chalkboard paint.  I used a white sharpie and wrote
her name.  Bought a new star and painted it red and bought
some ruler ribbon.  Glued it on using E6000. 
Mrs. Murray was thrilled with the result.

Saturday, December 17, 2011

Seven Days of Christmas Crafting


Today is Day Seven of
Seven Days of Christmas Crafting.
This little Santa can be used as an ornament or
the inside can be filled with candy.

I am sure my daughter wouldn't mind me sharing her
craft since we worked on it together.

We used a petal die cut from sizzix and used
various punches.

Hope you enjoyed the different crafts
this week as much a I did.

Happy Crafting and Merry Christmas!

Friday, December 16, 2011

Seven Days of Christmas Crafting


Today is Day Six of
Seven Days of Christmas Crafting.
I bought a kit at Babies R Us to do this
handprint of my granddaughter.  It is very light weight.
We had to spray cooking spray on her hand so
it would stop sticking.

Thursday, December 15, 2011

Seven Days of Christmas Crafting

Today is Day Five of
Seven Days of Christmas Crafting.

I try to recycle whenever I can.
I used empty cans and wrapped them with duct tape (Yes, that's duct tape)
and embellished with ribbon and bows.

They make cute containers for gift cards, candy, or any small gift.
Just wrapped your gift in tissue paper or cellophane and place inside.

My desire is to inspire...Be inspired!!

Wednesday, December 14, 2011

Seven Days of Christmas Crafting


Today is Day Four
of Seven Days of Christmas Crafting
Gift tags are always fun to make.

I used my cricut to cut out the tags.
Emboss with cuttlebug folders in my sizzix.

And used various punches and stamps.

Tie with a pretty ribbon and done!
Hope you are being inspired to take a ride on the crafting train!

Tuesday, December 13, 2011

Seven Days of Christmas Crafting

Today is Day Three of
Seven Days of Christmas Crafting

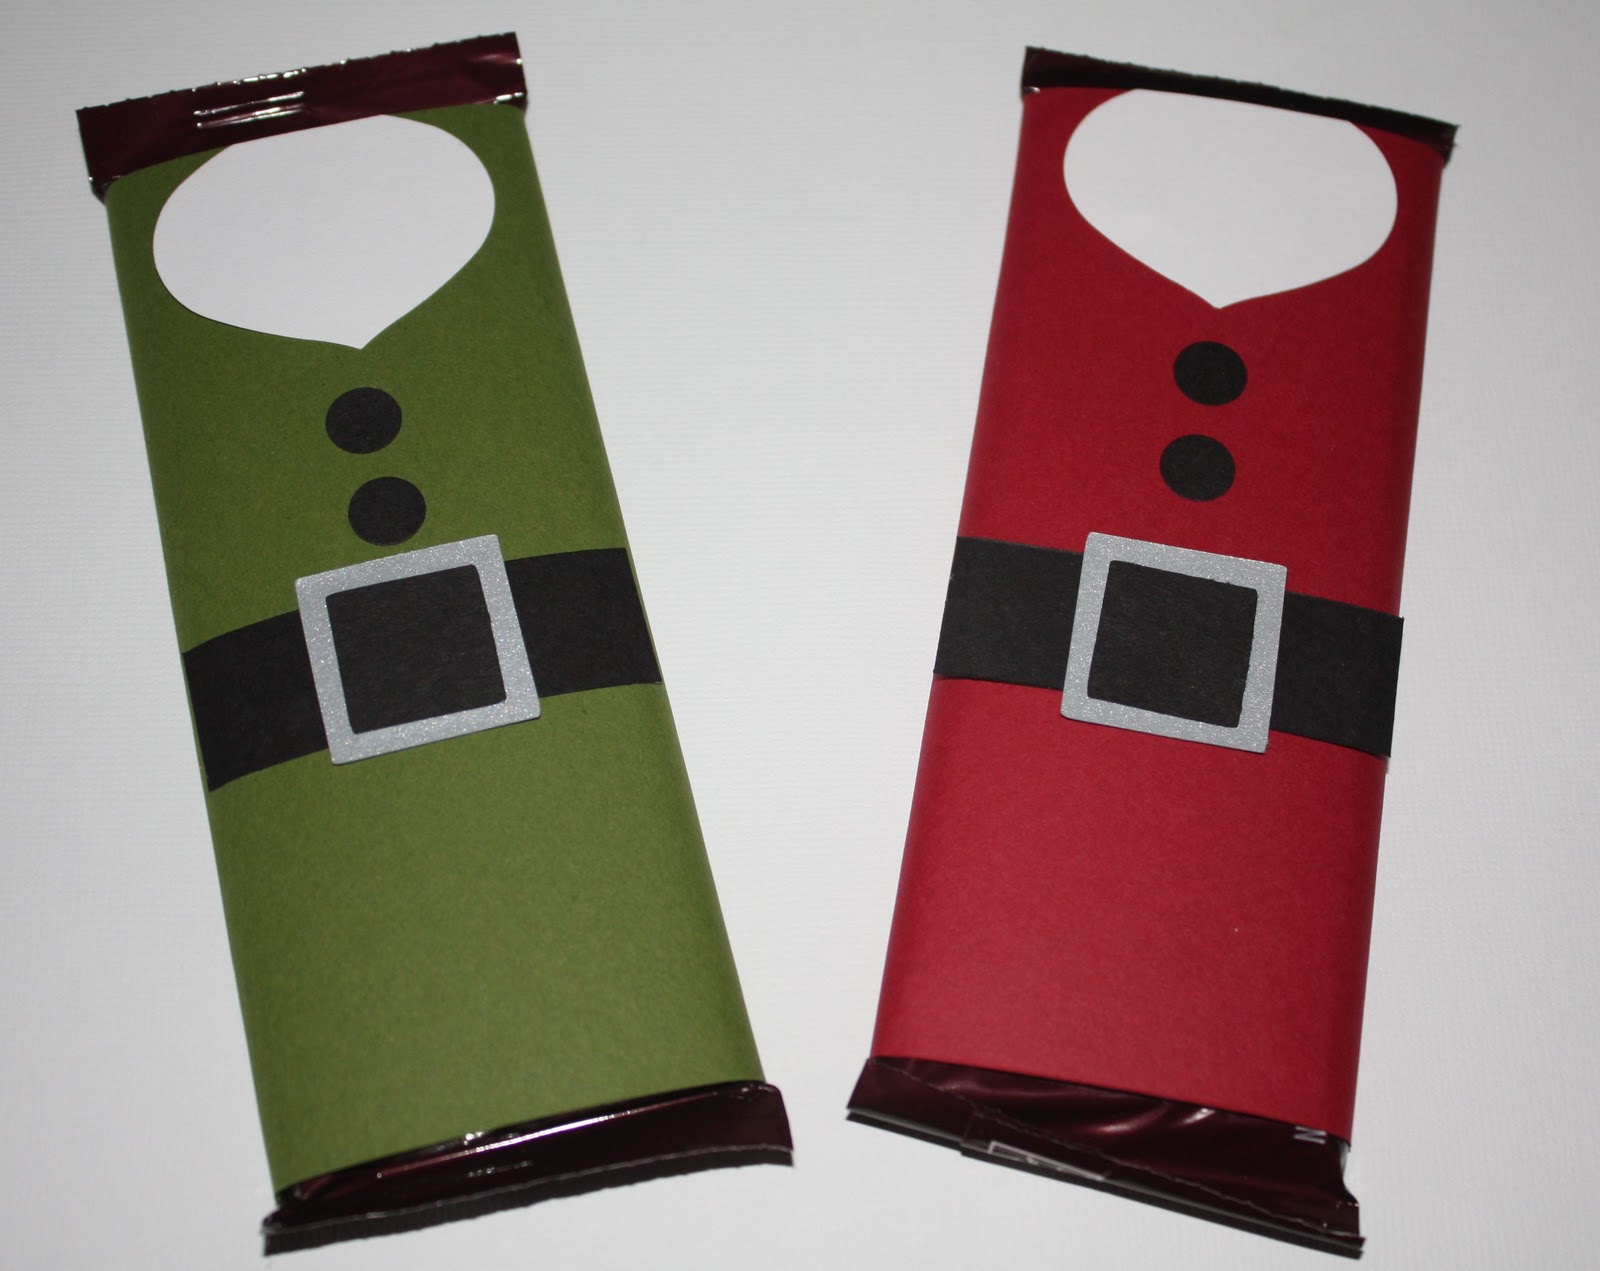
How about these cute Santa's helpers.
Hershey candy bar wrapped to look like Santa and his Elves.
These are going to make cute Christmas bingo prizes.
Enjoy!!

Monday, December 12, 2011

Seven Days of Christmas Crafting

Today is Day Two of
Seven Days of Christmas Crafting

I used my sizzix die cut to cut out the bag.
Then embellished it with eyes, nose, glitter pompoms,
and glitter paper for the handle. 

Sunday, December 11, 2011

Seven Days of Christmas Crafting

Today, I begin my "Seven Days Of Christmas Crafting". 
Simple, Quick and Easy Projects. 
Enjoy!

Day One
Starbucks Gift Card Holder


Tape a Starbucks gift card to the inside card


Friday, November 4, 2011

5 for Friday

                                                                 5 for Friday with Janna
                                                                  What I did this week...
Went Trick or Treating with my
granddaughter and my grand nieces and nephews.
I only lasted a couple of blocks and
then went home and passed out candy.
Started a new antibiotic.
Hopefully this one will kick my ear infection.


Finished table numbers for our church event.

Treated myself to caramel apples.
I melted 8 caramels from Sprouts in a cup with a little
bit of water in the microwave and cut up an apple.
Yum!

                                                  And had my coffee in my Christmas cup.
Because I could.  Haha!
Have a great weekend

Wednesday, November 2, 2011

Pierced To Clip Earrings

As I said to the store clerk who just informed me that all jewelry
was buy one get one half off.  "Why don't you sell clip earring"?   I
can't wear pierced my ears get infected.  She said to me "You can
make them yourself'.  I said "oh I don't want to go to all
that trouble".  She said just go to Michael's and buy the
clip earrings and as long as the earring have a loop
at the top you can change from pierced to clip.

So here I go.  Target had the necklace and earrings
in a package for $15.00

Here are the clips and the earrings out of the packages.

I removed the pierced part.  Can you see the loop?

Put the loop on the front of the clip earring.

Closed the loop on the earring with this tool. 
 I removed the pierced part of the earring
with this tool also.

Here is the end result! 
Can wait to make more!!

Saturday, August 27, 2011

Baby Sock Cupcakes

I am always looking for unique gifts that I can make.
There many different version of baby sock cupcakes.

These are simple.  And my daughter helped.

I put 4 in a box.

And mailed them to Baby Page.

Friday, August 19, 2011

Daughter and Granddaughter Fun

My daughter and granddaughter came for a few days
and we crafted and baked.  My daughter wanted me
to share what we did.  Everything on this blog she made.

Pokeball card.

Cupcake card.

Ballerina dress card.

Santa treat box or giftcard holder.

She made caramel brownies.

Heart shaped chocolate chip cookies.

Peanut butter with white chocolate chip and M & M's
in a heart shape for her hubby.

I bought a walker for the baby.

This is her favorite face to make.
                                                               
I taught her how to crawl up the steps
which became her new favorite thing to do.

And I rocked her to sleep.
It was an awesome few days.


Wednesday, August 3, 2011

Baby Bib Flower Bouquet


I made this flower bouquet using bibs from Baby's R Us.


You can use washcloths too but I liked
the ruffles on the edge of these bibs.


I added a gift card from Baby's R Us.


Thursday, May 5, 2011

Pop Up Butterfly Note Cards

I made these cute butterfly note cards.
Start by cutting white cardstock 3 1/2" x 5 1/2"

Fold in half and place slightly below butterfly wings
on sizzix "Beautiful butterfly bigz" die cut.

After it is cut, it will be a card.

Make a score line between wings.

Fold the score line.

Cut designer cardstock 3" x 5"

You can cut two different papers at the same time.

Use a glue stick or runner and glue just the top flaps.

Place the larger butterfly directly on top.

Punch a hole in the smaller butterfly.

Place a brad in the center.

This is the back of smaller butterfly.
Add a small pop dot or glue dot.

Place small butterfly on top of larger butterfly.
Done and it stands up.

Here it is all folded.

I made envelopes to fit using my cricut
"Pink Journey" cartridge.